Hey, wassup guys. My brother happened to recently install Android 4.0 Ice Cream Sandwich on VirtualBox on his windows 7 laptop (64-bit)
Here are some instructions if you happen to desire to install it on your PC to experience Ice Cream Sandwich without the need of a Android Device (or even if you can’t afford a new Android phone, but you are still curious to experience it.)
So here we start with the process.


Once downloaded the Android 4.0 operating system (most recent release candidate), its now time to download VirtualBox.

Once downloaded, right click the set up file and click on Run as Administrator (Just in case if you are not the administrator of the computer, you need the administrator rights to fully install all the features of Virtualbox software), if prompted whether you would want to allow the program….. Just click YES and move on!


Congrats! You have now successfully installed VirtualBox on your computer.


In Version (drop-down list) select Other Linux


Awesome, you have now created the harddisk!
As you start the virtual machine, it would give you instructions to choose a virtual disk file (ISO), click on Browse icon

Now select the android ISO file you downloaded in first step from Android x86.org
Once selected the android ISO file, it’s now time to click on START and start the installation of Android Operating system.
Here you can RUN the operating system directly using LIVE CD ISO, the one that you selected in the previous step, alternatively you can also install the Android Operating system.
I generally prefer running Android because unlike conventional computer operating systems, mobile operating systems are released in newer versions quite often, so if you just run it, you could simply download the newer version from the website mentioned above and repeat the steps above and simply select the newer version of Android Operating system and run that.
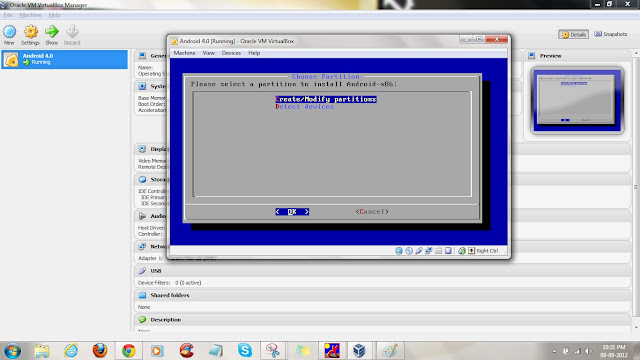
However, lets consider installing here, Once you select Install Option, you now get the option to create / modify partitions, Select Create / modify partitions and highlight OK (using arrow keys) and hit Enter (Return) key.
Now it shall show you the available partition and its size, you here need to select NEW (using Arrow keys again) and hit enter (return) button.

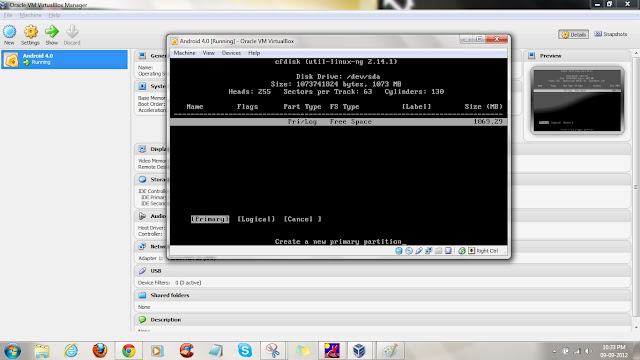
In type of partition select, Primary
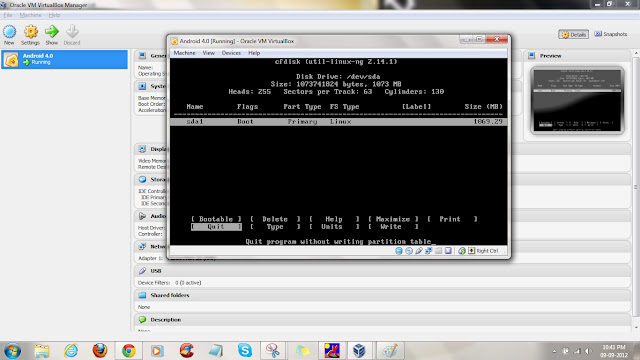
Once done, select the partition as Bootable and hit the enter (return)

Once done, you now need to highlight the Write button and hit enter, it would now ask to type “yes” or “no” to confirm if you are ok with writing to new hard disk, type “yes”, it might show only typing “ye” but it is actually considering “yes” and just hit enter.
Once done, it will start writing, after it shows “Wrote”, highlight “Quit” and hit the enter.
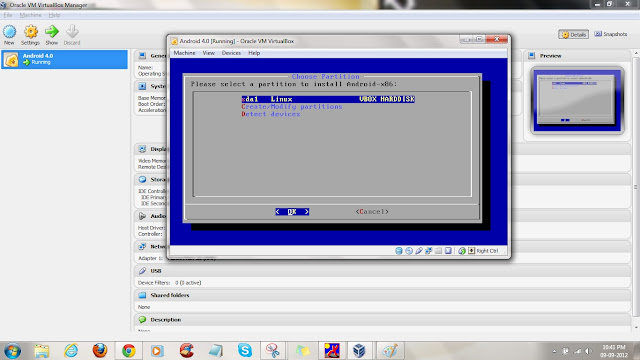
Now you must come outside and see a new entry on the available hard disk, in my case it shows as below:
Highlight the hard disk you just created named “sda1 Linux VBOX Harddisk” and highlight “OK” and hit Enter
Select FAT32 and highlight OK and hit enter

If asks for confirmation, select yes and move on!
Once format finishes, it must now ask for Installing Boot Loader GRUB?
Highlight YES and hit enter

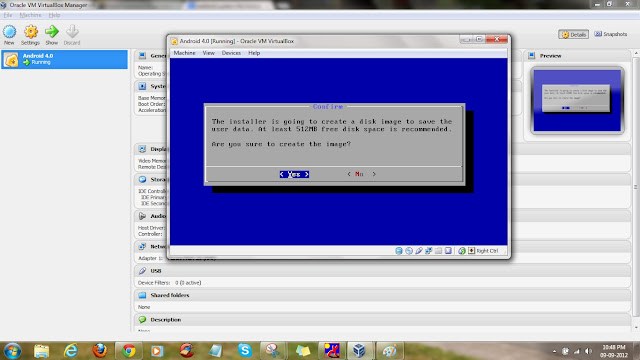
Now it must ask for confirmation to create a disk image, highlight YES and hit enter
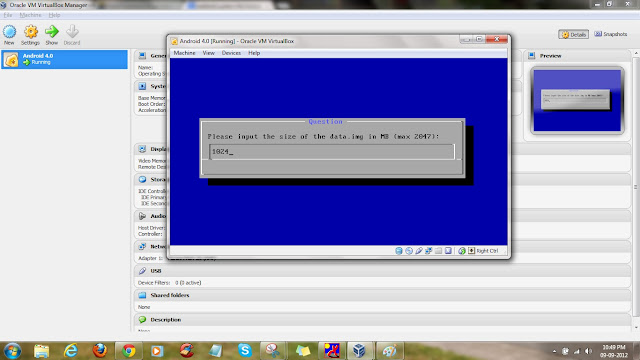
Upon hitting Yes, it would ask you to select the size of the disk image, this depends on the size of the hard disk you selected back at hard disk creation level.
As I had created the hard disk of 1 GB, I am selecting 1024 MB.
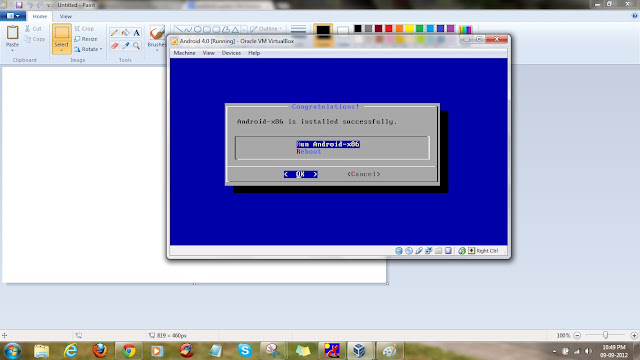
Once done, now it must show that the installation has completed successfully and now it must show the option to Run Android-x86.
Select Run Android x86 and hit enter
Now the android must have started

Once Android installed, hit the right CTRL / right CMD button and click on Machine and select Disable Mouse Integration, it would activate the cursor in the Android operating system, allowing you to easily navigate and configure your new Android Operating System.

Now go on configuring your Android operating system according to the Google’s friendly instructions and you must be up and running with latest Android Ice Cream Sandwich Operating system in no time!
All the best! J
In case of any issues, I would suggest you to LIVE RUN the Android operating system directly from the CD rather than installing it. Its much more stable as per my experience so far with it.
Here are some instructions if you happen to desire to install it on your PC to experience Ice Cream Sandwich without the need of a Android Device (or even if you can’t afford a new Android phone, but you are still curious to experience it.)
So here we start with the process.
Get Android 4.0 operating sytem:
Visit Android-x86.org and look for the latest Android-x86 4.0 RC Release, as of today, the latest release available online is of 15 Jul 2012 - Android-x86 4.0-RC2 (see the screenshot below).
After clicking on the most recent version of Android-x86 4.0 you generally have the option to download the Android operating system Live CD ISOs from either android-x86.org or code.google.com, I prefer Code.google.com, reason, because it gives a clear list of available versions of Android 4.0 (Preferred: Asus_Laptop version, it works exactly fine on my Dell Windows 7 laptop).

Once downloaded the Android 4.0 operating system (most recent release candidate), its now time to download VirtualBox.
Installing VirtualBox on your computer: (Step by Step guideline for a windows 7 based computer)
( This is clearly available for both Windows as well as Mac based computers and could be downloaded form Virtualbox.org Downloads)

Once downloaded, right click the set up file and click on Run as Administrator (Just in case if you are not the administrator of the computer, you need the administrator rights to fully install all the features of Virtualbox software), if prompted whether you would want to allow the program….. Just click YES and move on!


Click on Install:


Configuring VirtualBox and creating a Virtual Machine
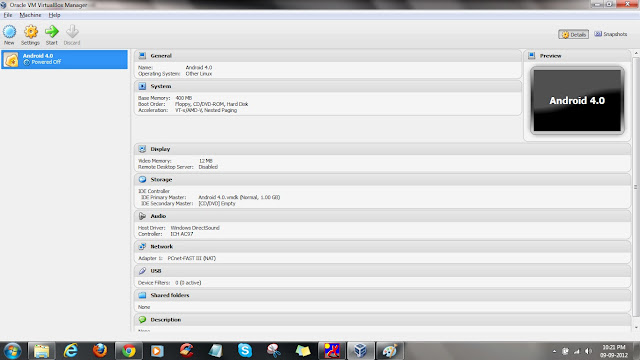
Once installed, open VirtualBox software, it should probably look like this:
Name, Type and Version of Virtual Machine
Here, click on NEW
and
Name the operating system (Whatever you wish to)
In type (drop-down list) select LinuxIn Version (drop-down list) select Other Linux

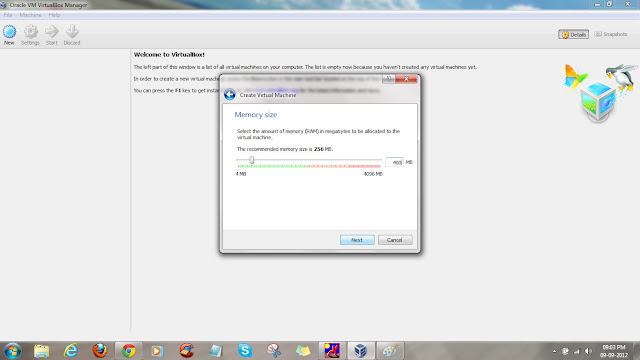
Allocating Memory Size:
Allocate the memory size according to what is available RAM in your laptop, assuming your laptop has at least 2 GB RAM available, allocate 400 MB of RAM to this new operating system for better performance (although recommended is 256 MB)
Hard Drive
Now you must create a new virtual hard drive
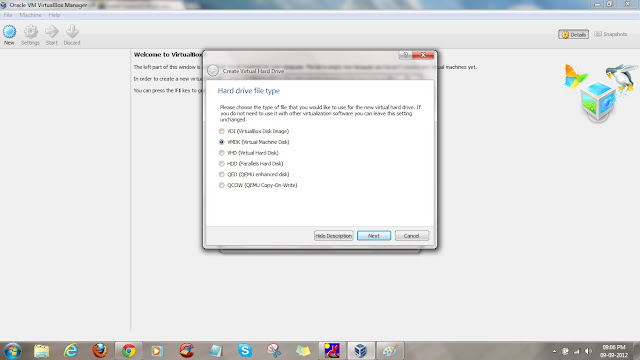
Hard Drive File Type
Select the type of the file as VMDK (Virtual Machine Disk)
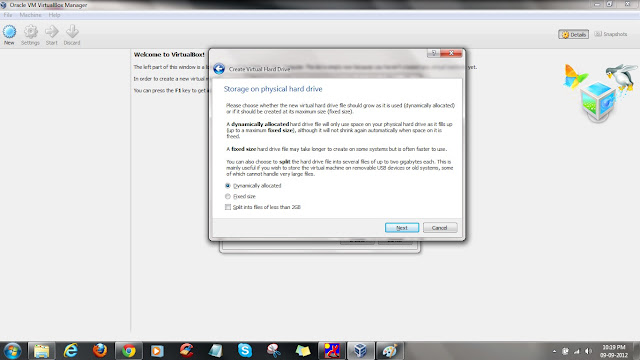
Storage on Physical Hard Drive
You can here select a Fixed storage or a Dynamically Allocated, the good thing about Dynamically allocated is that it won’t take up space initially and would gradually take only the space as required by the operating system.
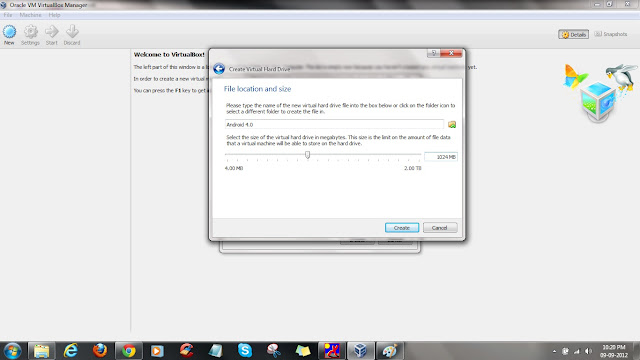
File Allocation and Size:
This is the maximum size till which the previously dynamically allocated hard drive would increase. I have set it up to 1GB, the normal recommended is 512 MB
Awesome, you have now created the harddisk!
Installing Android on Virtual Machine
Now click on Start and start the Virtual machine
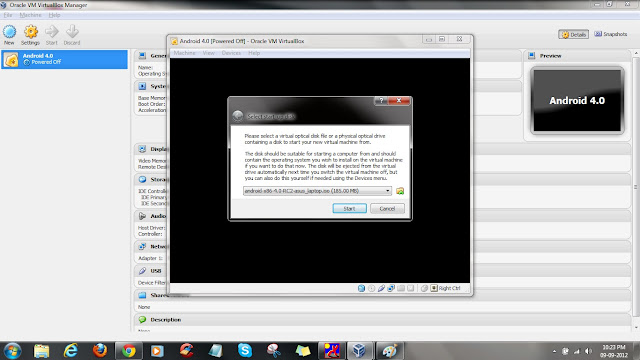
As you start the virtual machine, it would give you instructions to choose a virtual disk file (ISO), click on Browse icon

Now select the android ISO file you downloaded in first step from Android x86.org

Starting from here, everytime you click on the screen of the virual machine, you need to hit the right CTRL (on Windows) or right CMD (on Mac) to come back to your base (host) operating system, so if you are unable to use keyboard on other applications while this installation is going on, you need to hit the right CTRL / right CMD button to get out of the virtual machine and come in host machine (windows / mac)"
Once selected the android ISO file, it’s now time to click on START and start the installation of Android Operating system.
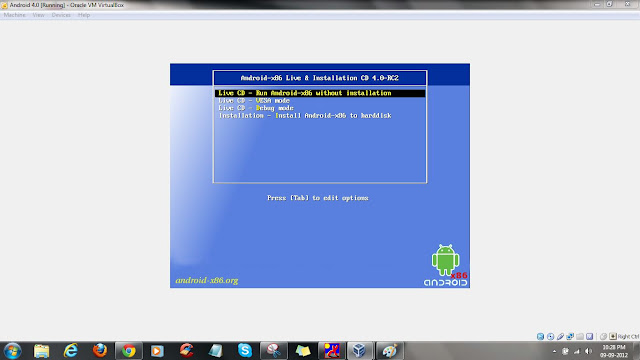
Here you can RUN the operating system directly using LIVE CD ISO, the one that you selected in the previous step, alternatively you can also install the Android Operating system.

I generally prefer running Android because unlike conventional computer operating systems, mobile operating systems are released in newer versions quite often, so if you just run it, you could simply download the newer version from the website mentioned above and repeat the steps above and simply select the newer version of Android Operating system and run that.
However, lets consider installing here, Once you select Install Option, you now get the option to create / modify partitions, Select Create / modify partitions and highlight OK (using arrow keys) and hit Enter (Return) key.

Now it shall show you the available partition and its size, you here need to select NEW (using Arrow keys again) and hit enter (return) button.

In type of partition select, Primary

Once done, select the partition as Bootable and hit the enter (return)

Once done, you now need to highlight the Write button and hit enter, it would now ask to type “yes” or “no” to confirm if you are ok with writing to new hard disk, type “yes”, it might show only typing “ye” but it is actually considering “yes” and just hit enter.
Once done, it will start writing, after it shows “Wrote”, highlight “Quit” and hit the enter.

Now you must come outside and see a new entry on the available hard disk, in my case it shows as below:
Highlight the hard disk you just created named “sda1 Linux VBOX Harddisk” and highlight “OK” and hit Enter

Select FAT32 and highlight OK and hit enter

If asks for confirmation, select yes and move on!
Once format finishes, it must now ask for Installing Boot Loader GRUB?
Highlight YES and hit enter

Now it must ask for confirmation to create a disk image, highlight YES and hit enter

Upon hitting Yes, it would ask you to select the size of the disk image, this depends on the size of the hard disk you selected back at hard disk creation level.
As I had created the hard disk of 1 GB, I am selecting 1024 MB.

Once done, now it must show that the installation has completed successfully and now it must show the option to Run Android-x86.
Select Run Android x86 and hit enter

Now the android must have started

Once Android installed, hit the right CTRL / right CMD button and click on Machine and select Disable Mouse Integration, it would activate the cursor in the Android operating system, allowing you to easily navigate and configure your new Android Operating System.

Now go on configuring your Android operating system according to the Google’s friendly instructions and you must be up and running with latest Android Ice Cream Sandwich Operating system in no time!
All the best! J
In case of any issues, I would suggest you to LIVE RUN the Android operating system directly from the CD rather than installing it. Its much more stable as per my experience so far with it.
Your articles are very well written and unique.
ReplyDeletesuper one click root
Thanks Lisa :)
Deletehi, i tried doing on my laptop running windows 7 but its ain't working, can u help remotely if i give u access to my computer
ReplyDelete